Friday, April 15, 2011

Update 4/15/2011

Just a quick update on what's been going on. As you can see from my last post, I have moved the greenhouse, modified it, and put it back up. No much in there right now, just some lettuce and onions. The peppers are still inside under the lights.

This years pepper lineup is as follows:

Anaheim
Bhut Jolokia
Big Jim
Black Pearl
California Wonder
Caribbean Red
Cayenne
Chile de Arbol
Corno di Toro
Cubanelle
Filus Blue
Fooled You Hybrid
Golden Calwonder
Golden Marconi
Guajillo
Habanero
Jalapeno
Joe E Parker
Marbles
Medusa
New Mexico Chile
New Mexico Green Chile
NuMex 6-4
NuMex Sandia
NuMex Twilight
Orange Bell
Orange Sun Bell
Pepperoncini
Poinsettia
Purple Beauty
Serrano
Sunny Yellow Bell
Sweet Banana
Tepin
Thai Hot
Tobasco
Yellow Peter Pepper

Photobucket

Photobucket

Photobucket

Photobucket

This year I have also taken interest in heirloom tomatoes. I will be growing the following types of tomato. Most are heirloom. Only a few are hybrids.

Abe Lincoln
Amana Orange
Aunt Rubys German
Better Boy
Big Rainbow
Big Red
Black Krim
Box Car Willie
Brandywine Red
Cherokee Purple
Costoluto Genovese
Dixie Golden Giant
Early Girl
Juliet Hybrid
Kelloggs Breakfast
Mexico
Mule Team
Opalka
Red Cherry
Red Oxheart
Roma
Rutgers
Sun Gold Hybrid
Tigerella
Virginia Sweets
Yellow Pear

Photobucket

I also started some yellow, red, and white onions. I am using sets again this year, but by research shows that growing onions from seed is the best way to grow. I may try that next year. I also started some lettuce, canteloupe, water melon, and pumpkins. My son Kalon has planted a variety of things including pumpkins in which he wants to grow and then sell the pumpkins to the neighborhood kids.

Photobucket

Photobucket

Photobucket

Thursday, April 14, 2011

How To Build a PVC Greenhouse DIY Plans

Building a greenhouse does not have to be expensive and difficult. I designed this greenhouse with the intention of taking it down each year even though I don't. I designed it to come apart very easily. For those of you who follow my blog you will notice that this greenhouse is similar to the one I built a couple of eyars ago. Actually it is the same greenhouse just modified to be more sturdy, utilize more space, and simpler. I will try to hit the major points of building this greenhouse. Most measurements that I give are approximint not exact. If you have any questions, fell free to post a comment or email me directly.

Step 1

Take 4 2"x6"x12' boards and place them in a square. Nail the boards together like in the pic.
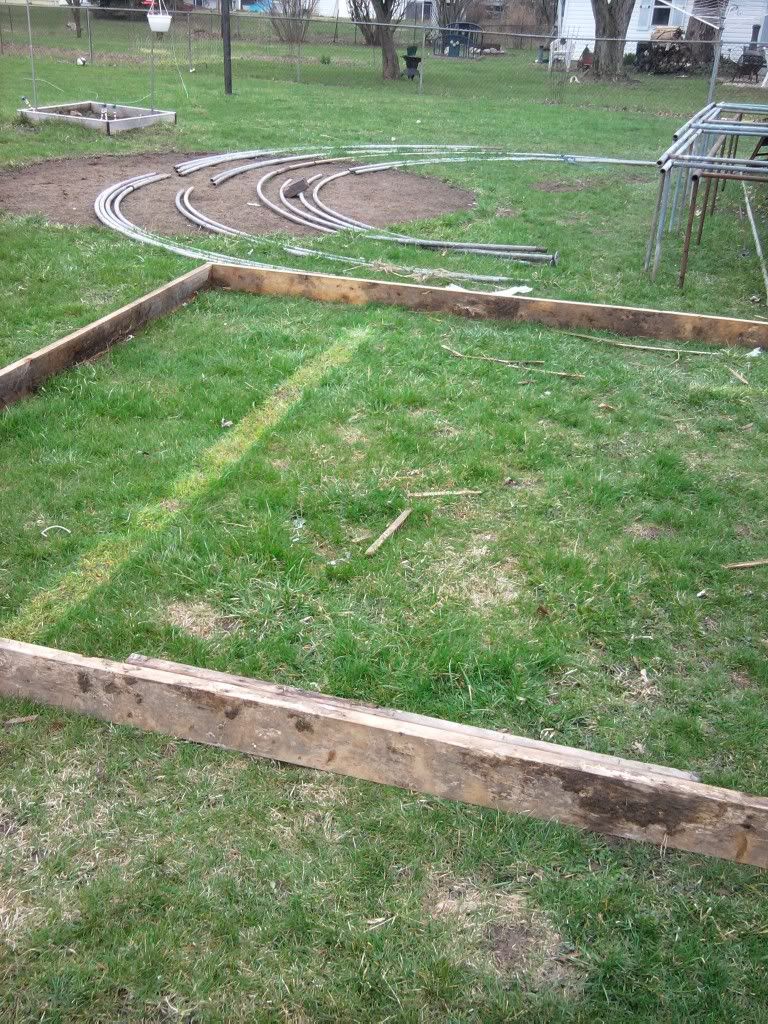
Photobucket

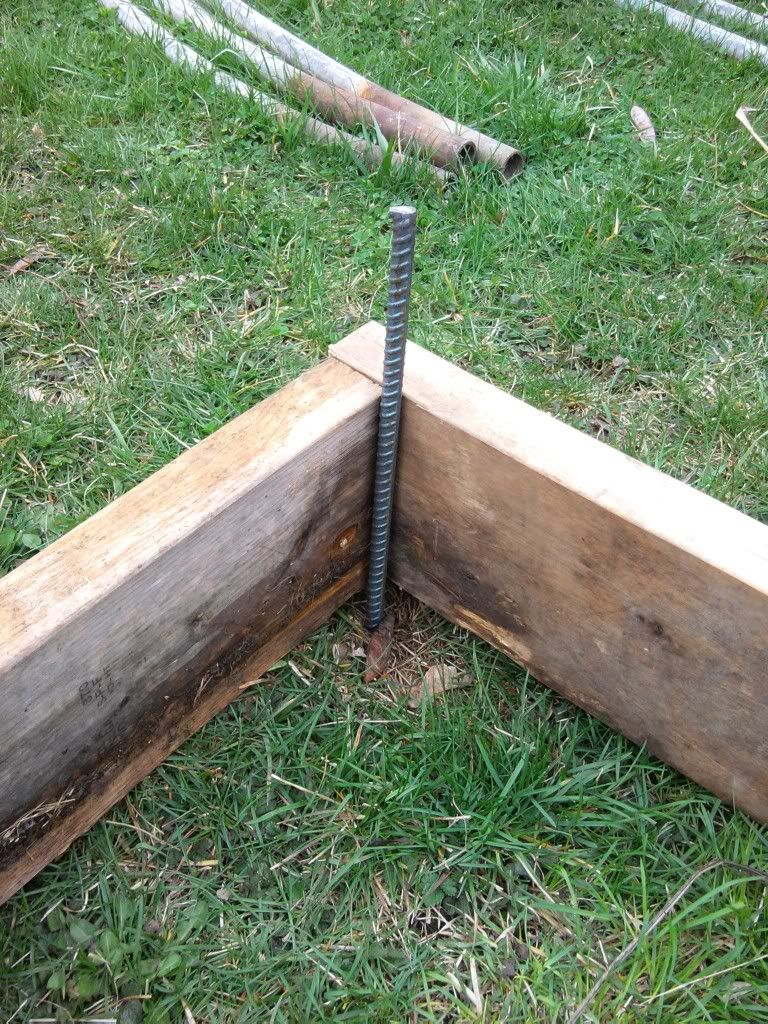
Next, pick which end the sides will be. When you have chosen the sides, hammer 3-4ft rebar in the ground 1.5-2ft deep. Space them roughly 3 feet apart. You will need 10 pieces of rebar for this greenhouse.
Photobucket

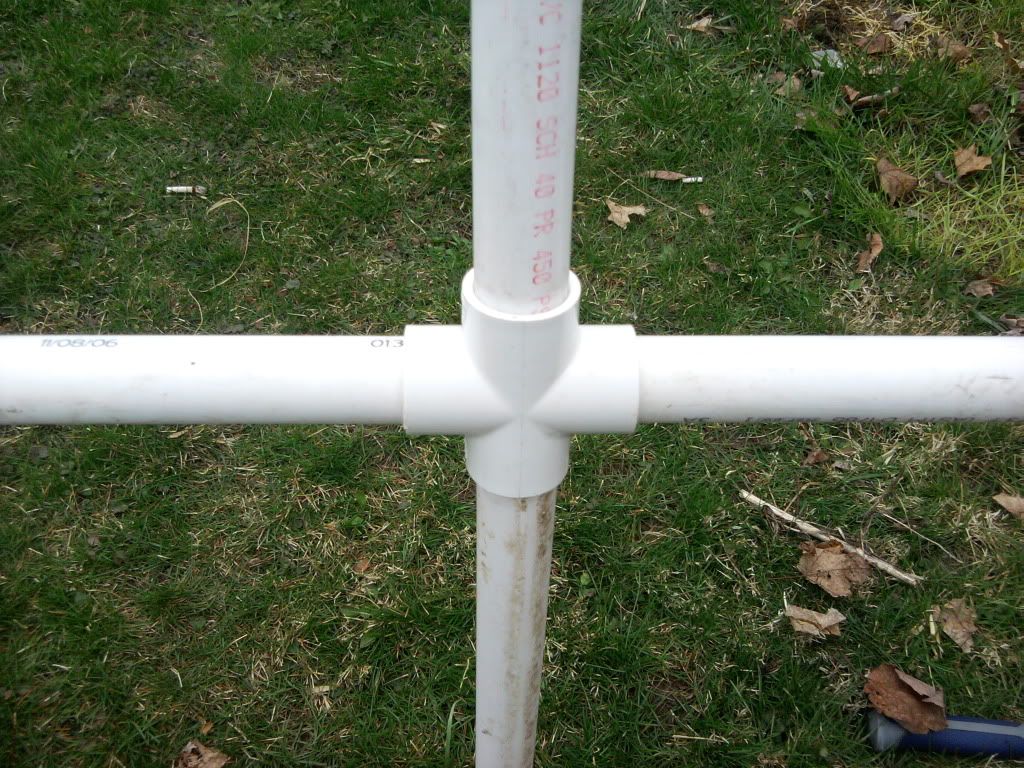
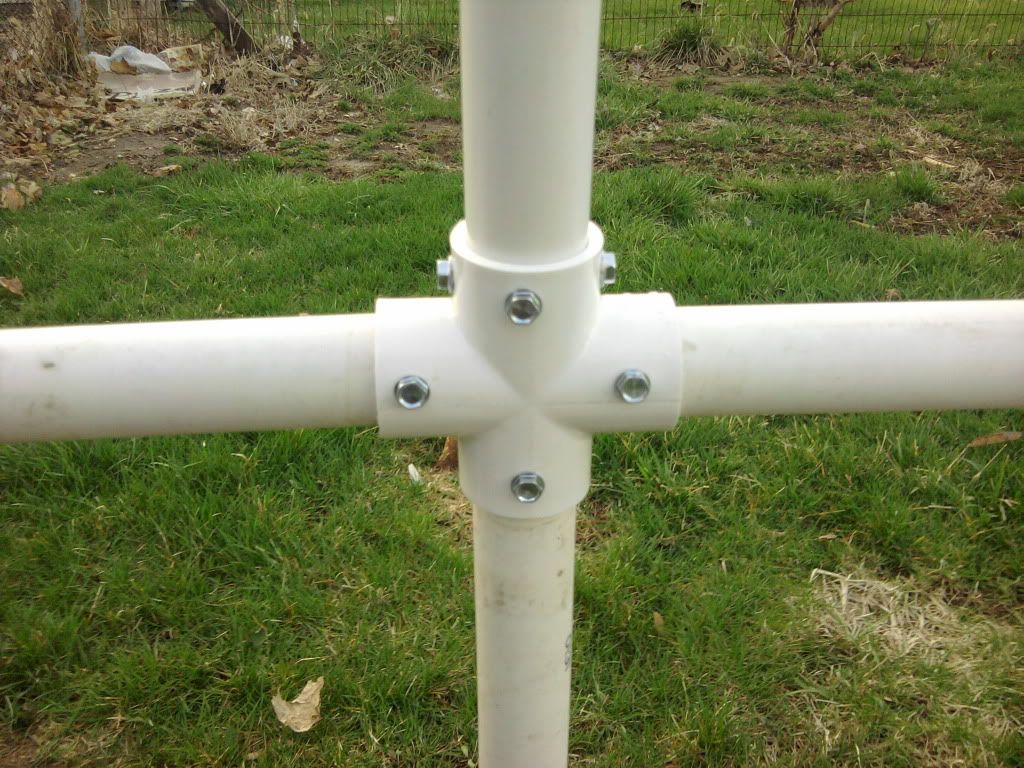
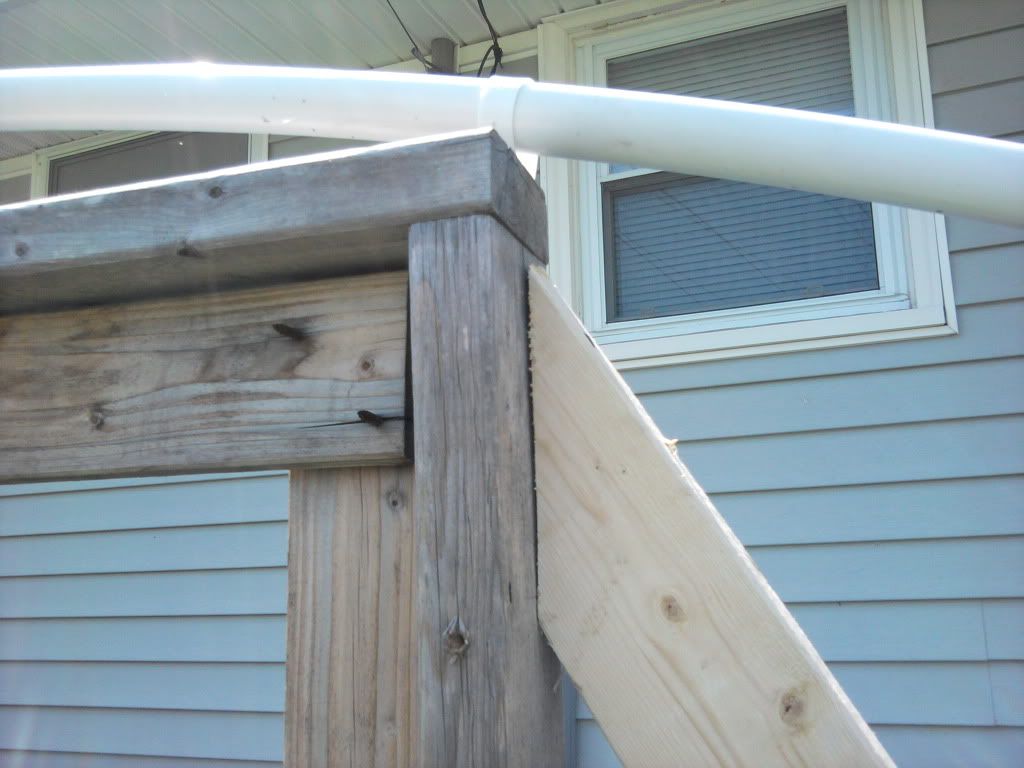
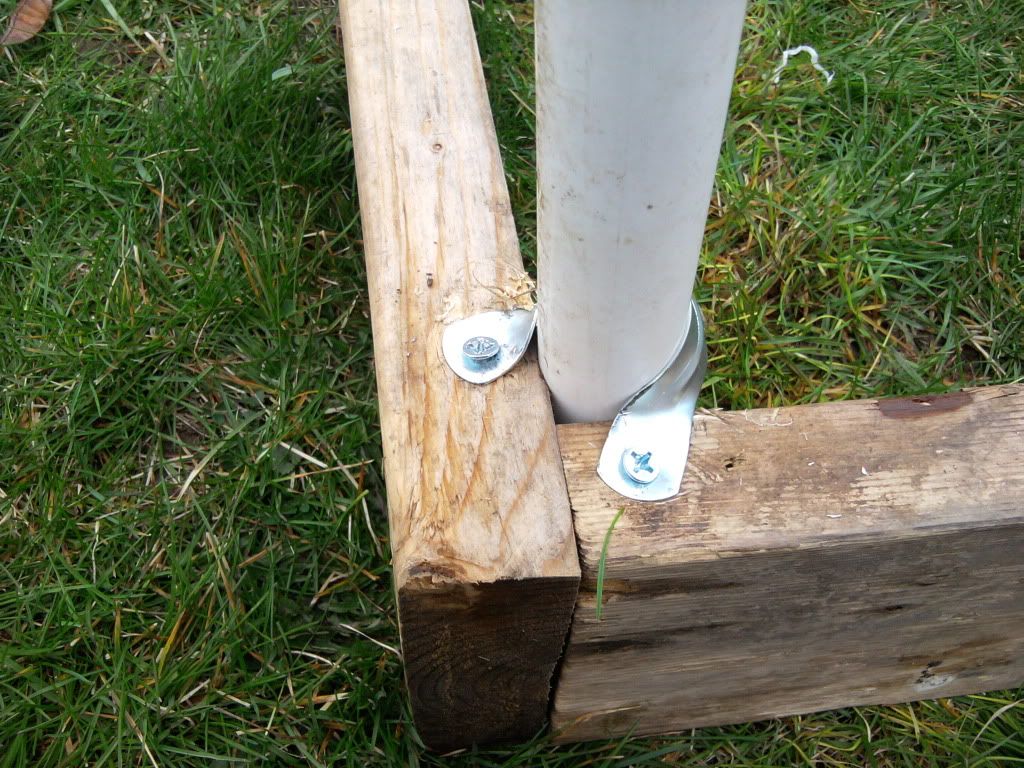
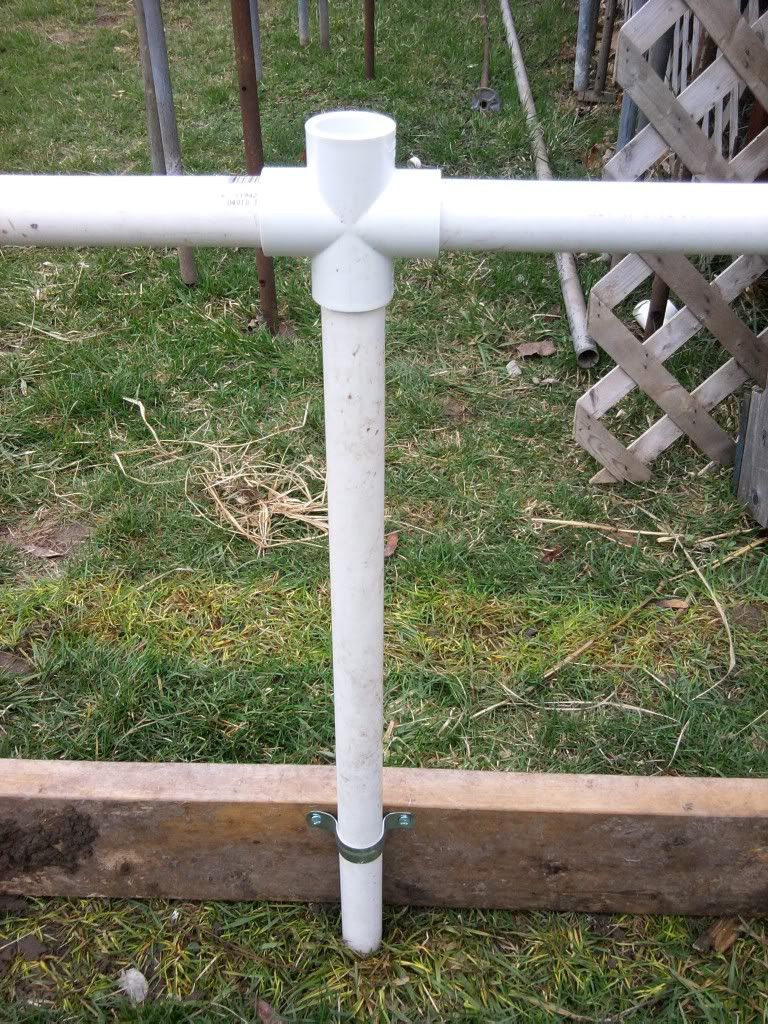
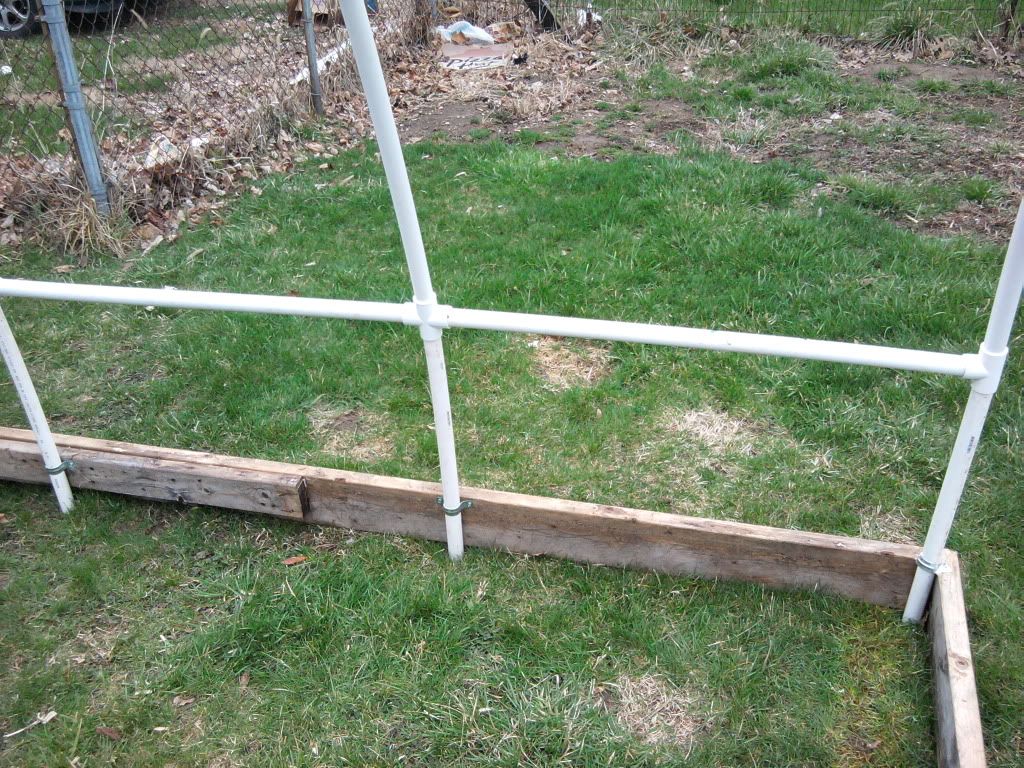
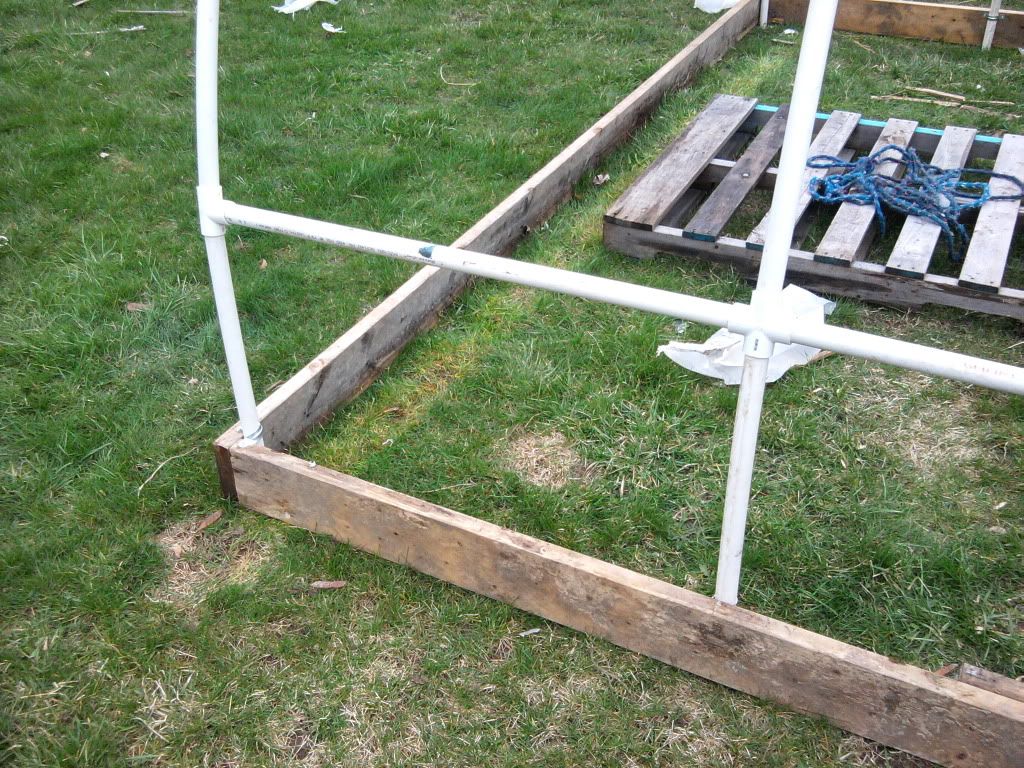
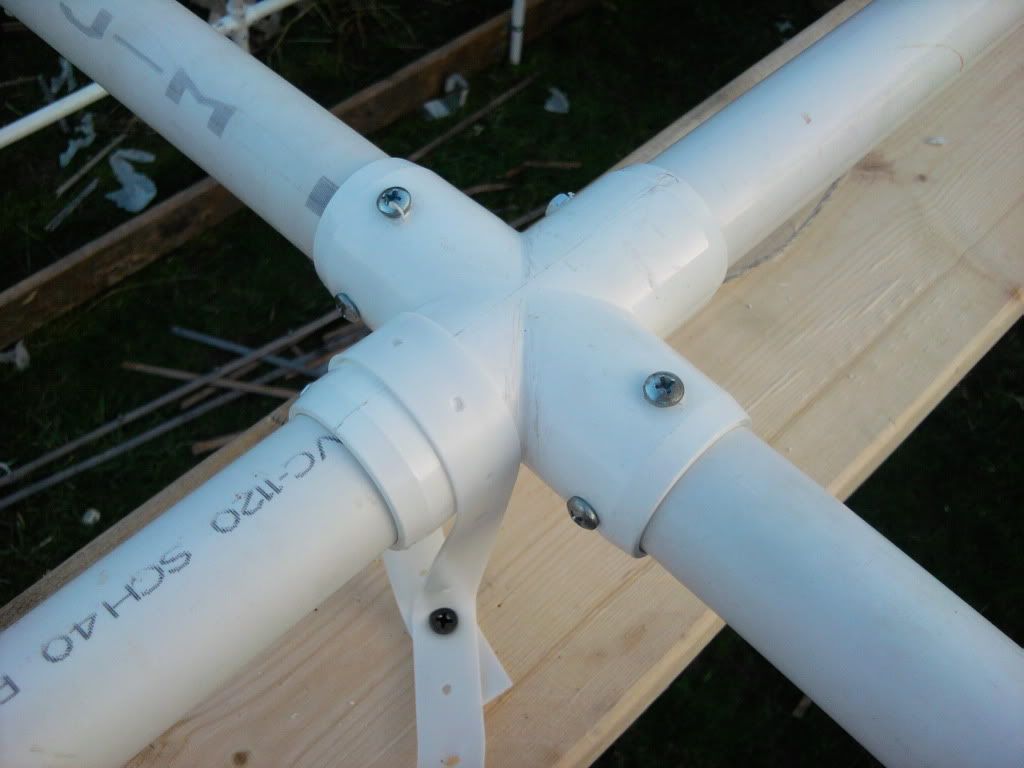
Next, over each piece of rebar, install a 24" piece of 1" PVC pipe. If it is an end piece, then use a "Tee" connector and if it is a middle piece then use a 4 way "Cross" connector like in the pic. In between each connector, install a 36" piece of 1" PVC. Basically you are building a wall out of PVC for the base layer. Use pipe clamp brackets to secure the 24" pieces of PVC pipe to the 2x6x12's. As you can see in the last pic, I had to kind of bend the bracket so it would work on the corner piece.
Photobucket

Photobucket

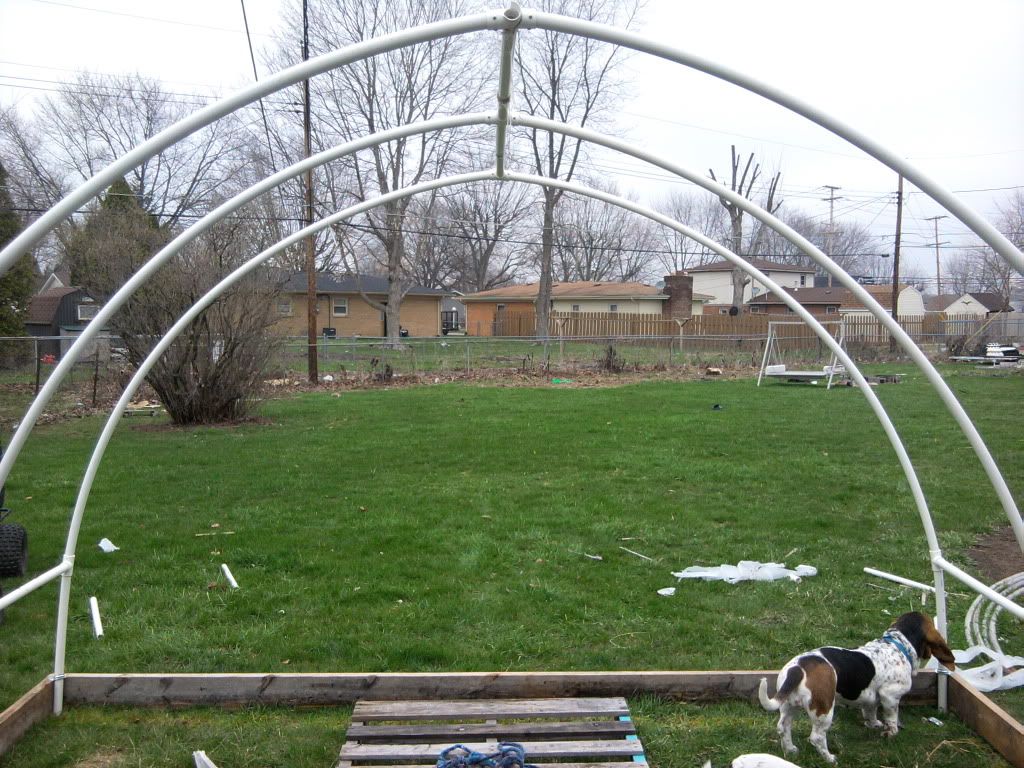
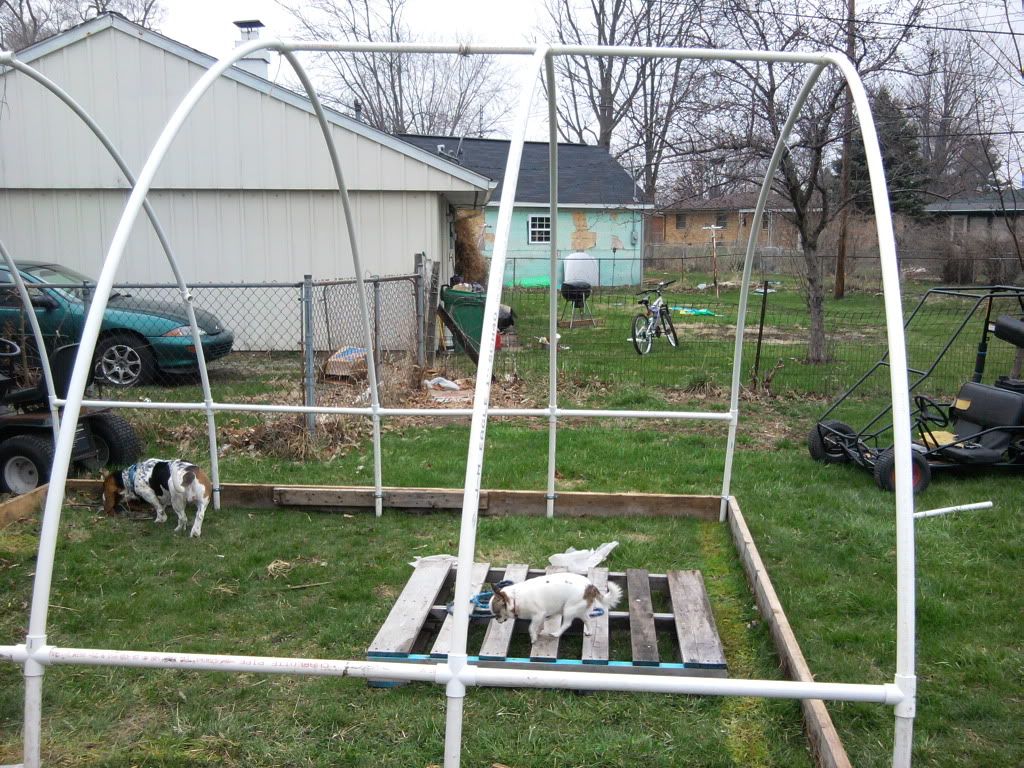
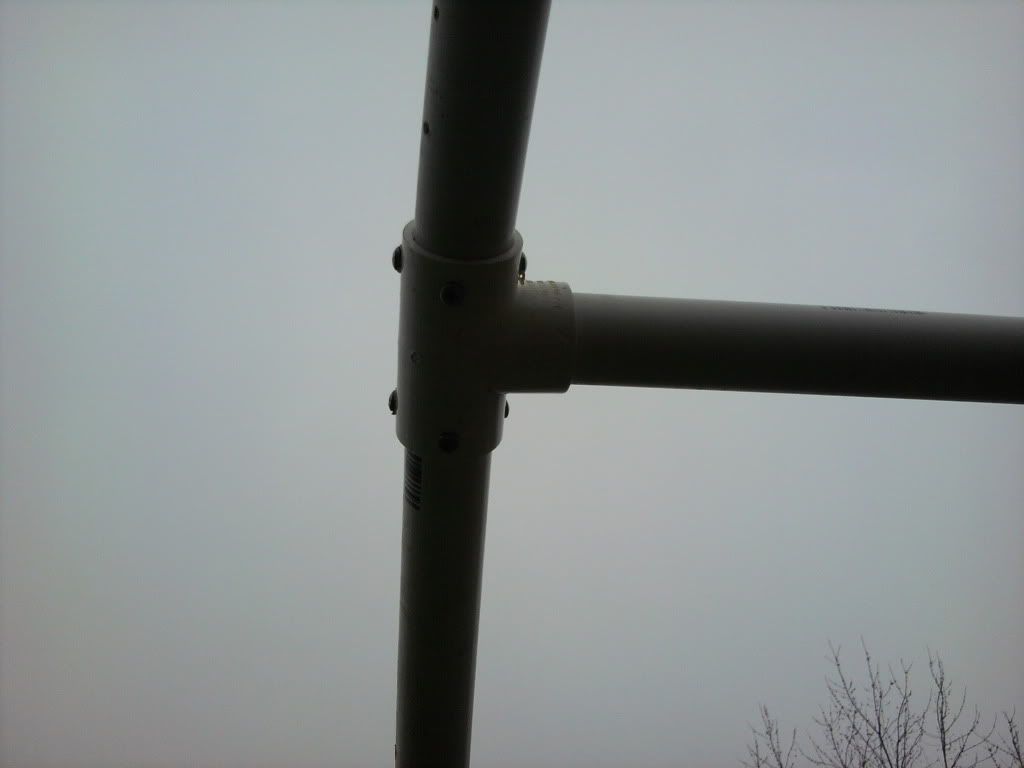
So now you have a base structure and the 2ft side walls complete. Next you want to add the hoops. Each side of the hoops are 8ft long. You could use 10ft pieces and eliminate the small 2ft tall wall. Just run the 10ft all the way to the ground and secure with pipe clamps. Anyways, I found it best to install each arch separately. I first get my 2 8ft pieces of PVC and connect them together with the proper connector. The proper connector is just like the sidewalls. If it is an end arch, then use a "Tee" connector. If it is a middle arch then use a 4-way "Cross" connector. Once you have all the arches installed, connect each arch to the others by installing a 3ft piece of PVC pipe. The other thing I di is make sure I secure each connector with self tapping screws. They work great and hold wonderfully.
Photobucket

Photobucket

Photobucket

Photobucket

Photobucket

Photobucket

Photobucket

Step 3

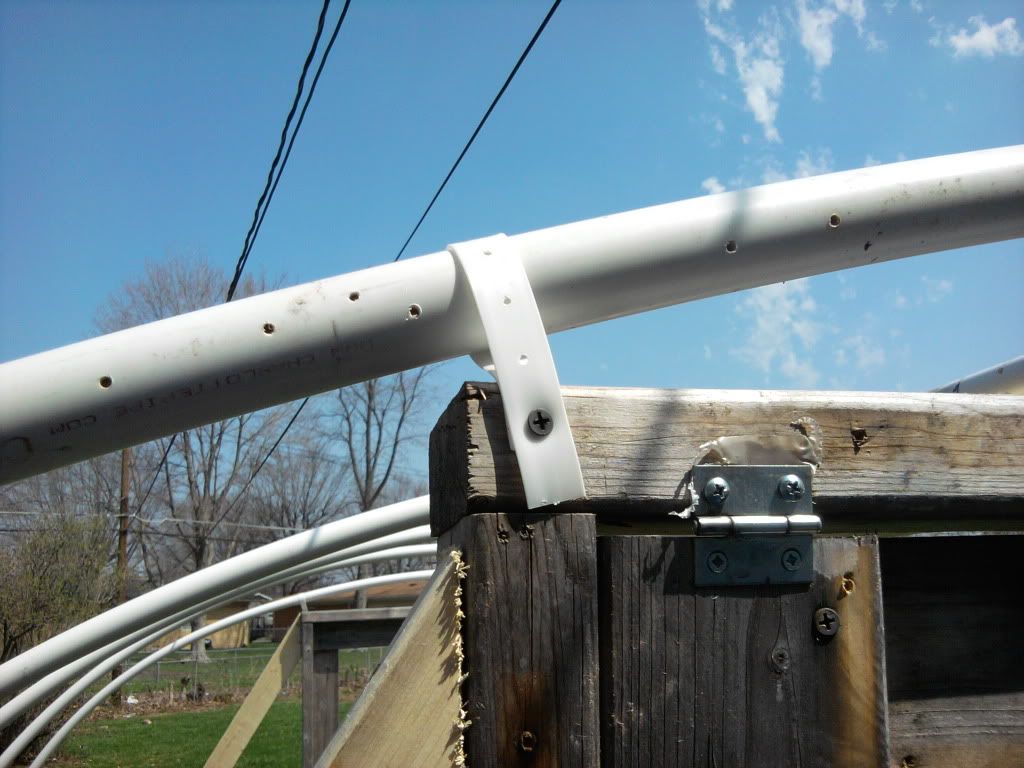
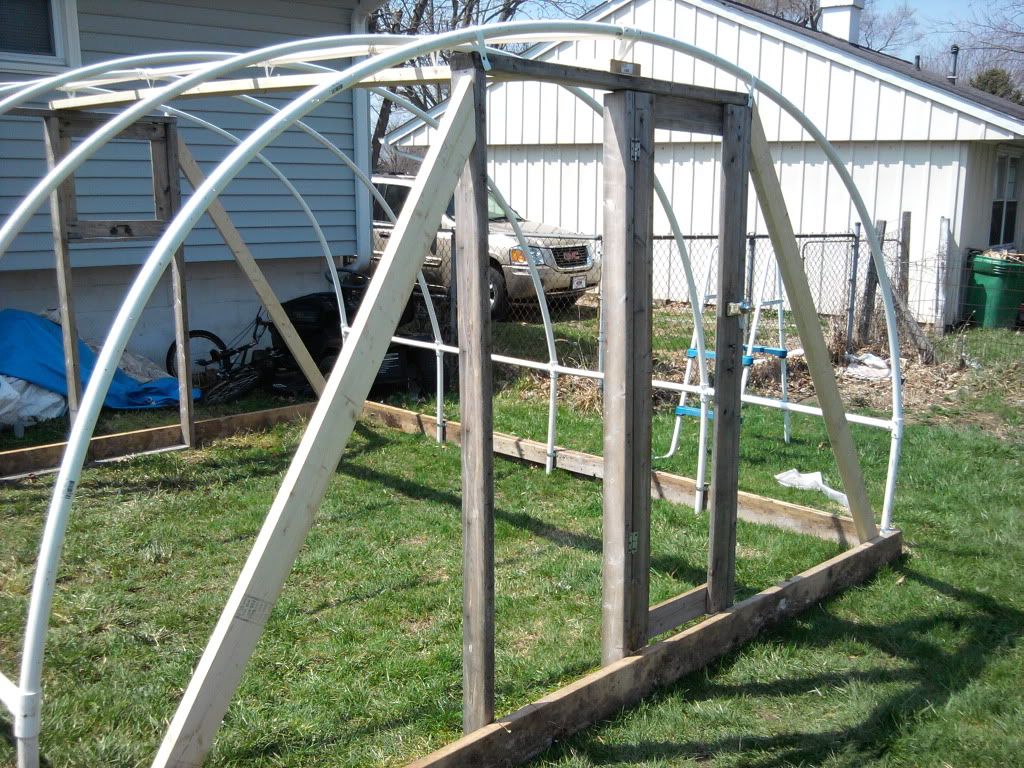
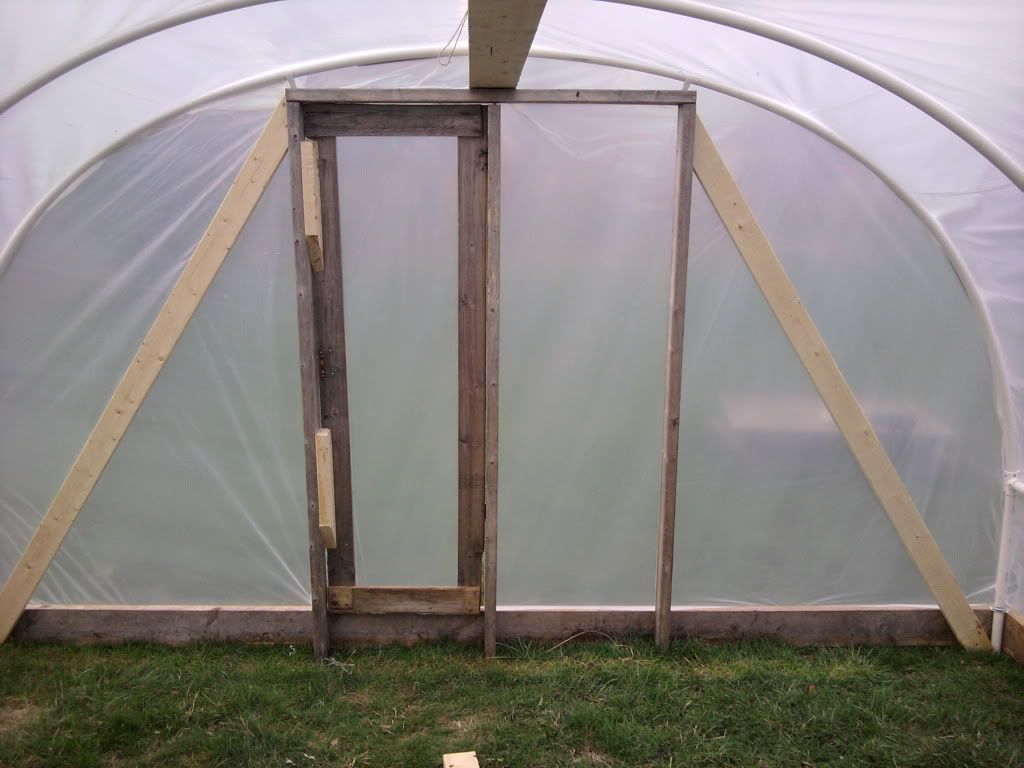
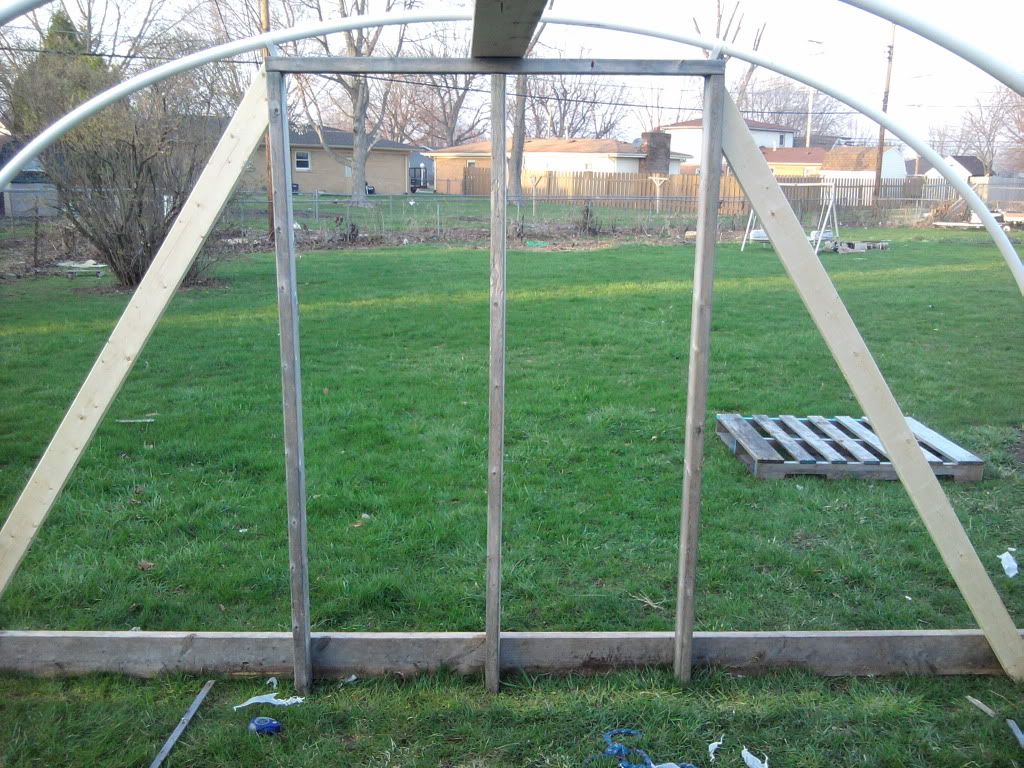
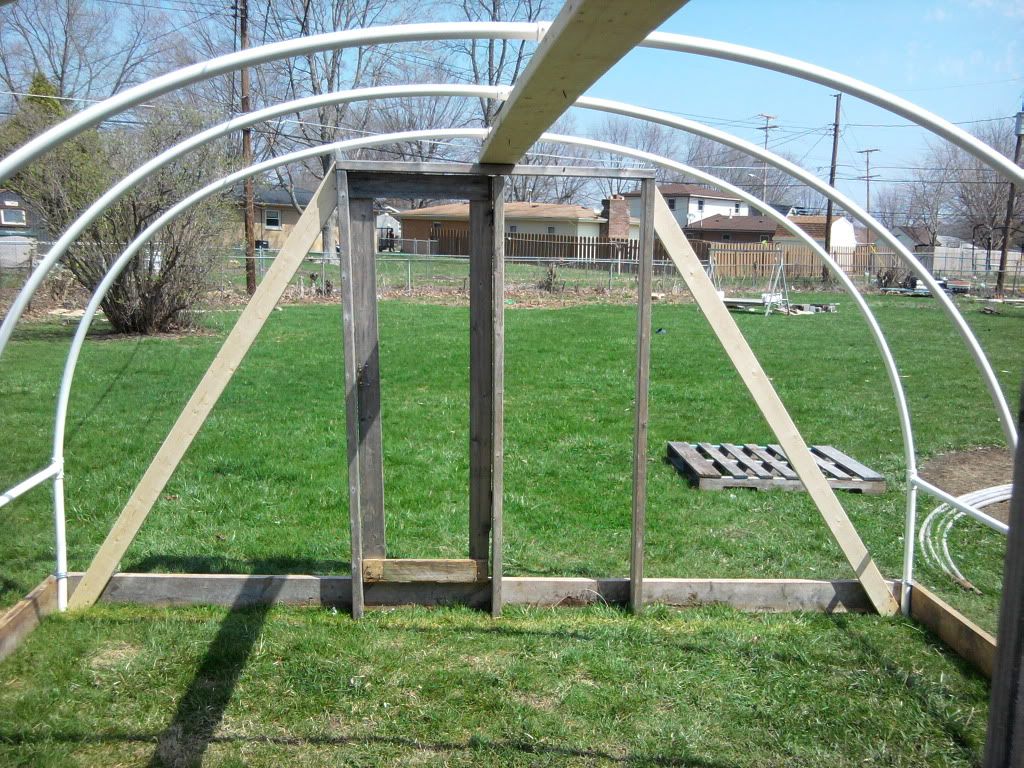
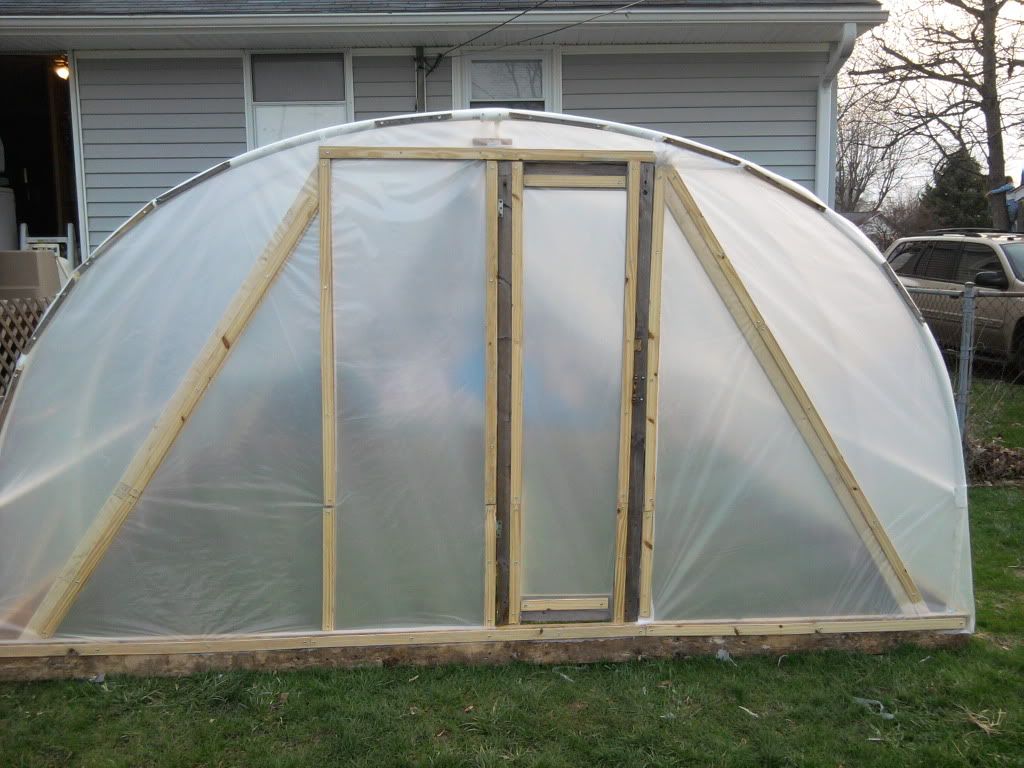
So now we have our base, our sidewalls, and out hoops. It is now looking more like a greenhouse. The next step is building endwalls for the greenhouse. What I did was use 3-2x4x6 and 2-2x4x4 and made an endwall like the one in the pic. I then cut 2 8ft 2x4's so they would fit snug to the frame I built. The 8ft boards are screwed to the frame and to the base of the greenhouse. To really square up the greenhouse I took a 2x6x12' board and ran it from one endwall frame to the other. This will also be used to secure the arches to. I used plastic pipe hanger to attch the arches on the ends to the endwall frame. This stuff is sold in the plumbing section and comes in a roll. It is just a couple of dollars.
Photobucket

Photobucket

Photobucket

Photobucket

Photobucket

Photobucket

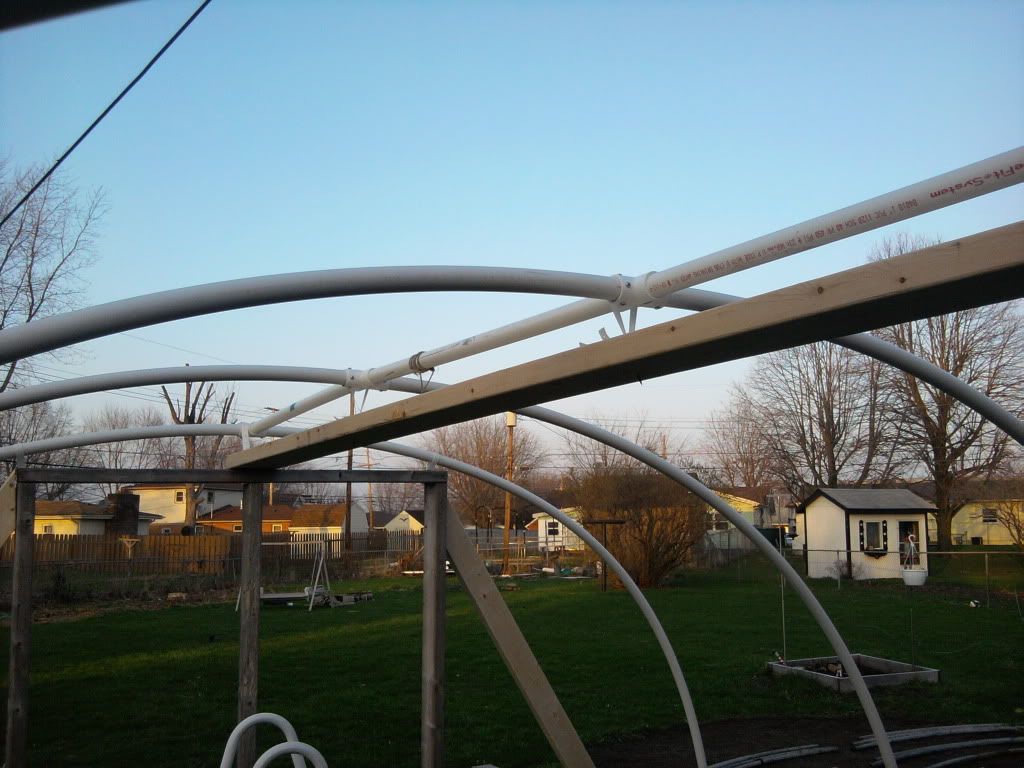
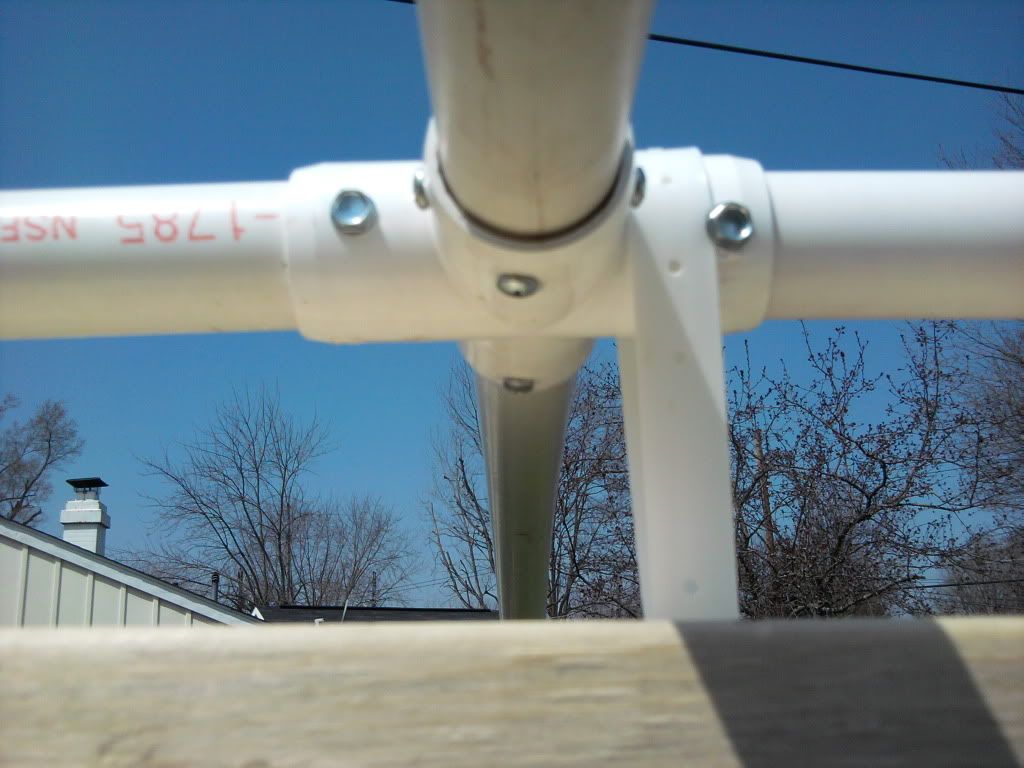
If you look at the pics you will see a top view and bottom view of the arches that are screwed to the 2x6 to is running along the top. Now when I did this, I pulled down the the arches as I screwed it to the 2x6. The reason I did this is to cut down on the tension at the peak where the connectors are screwed to the 8ft pipes. I hope this does not sound confusing. We will come back to that part when we are all done.
Photobucket

Photobucket

Step 4

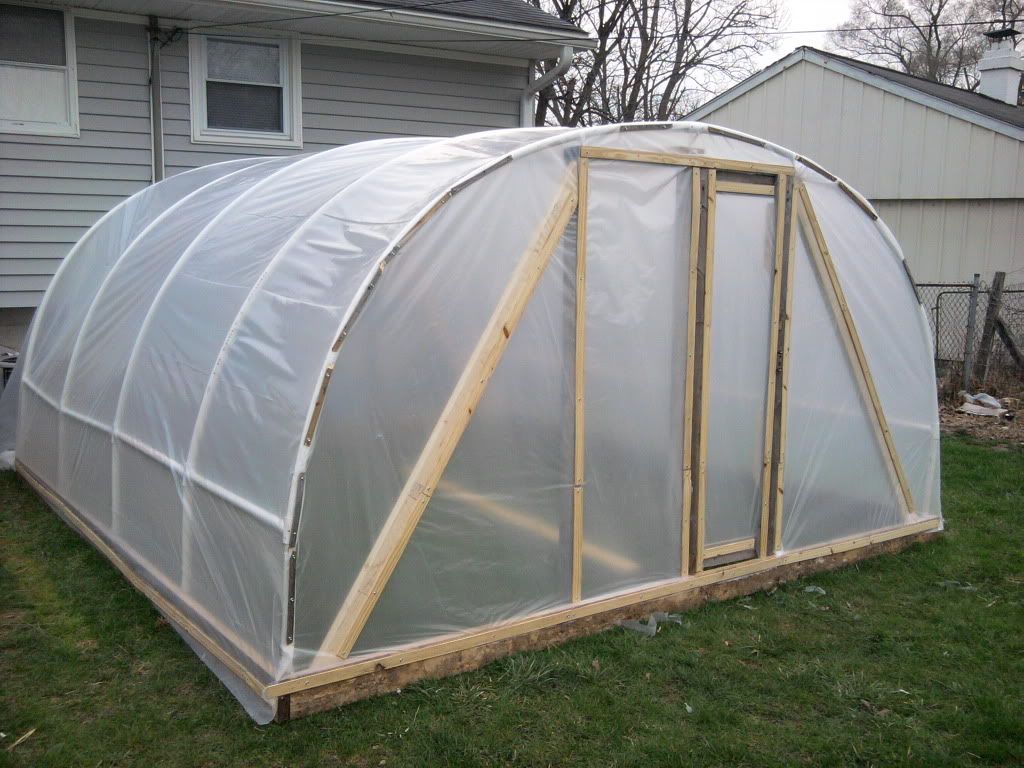
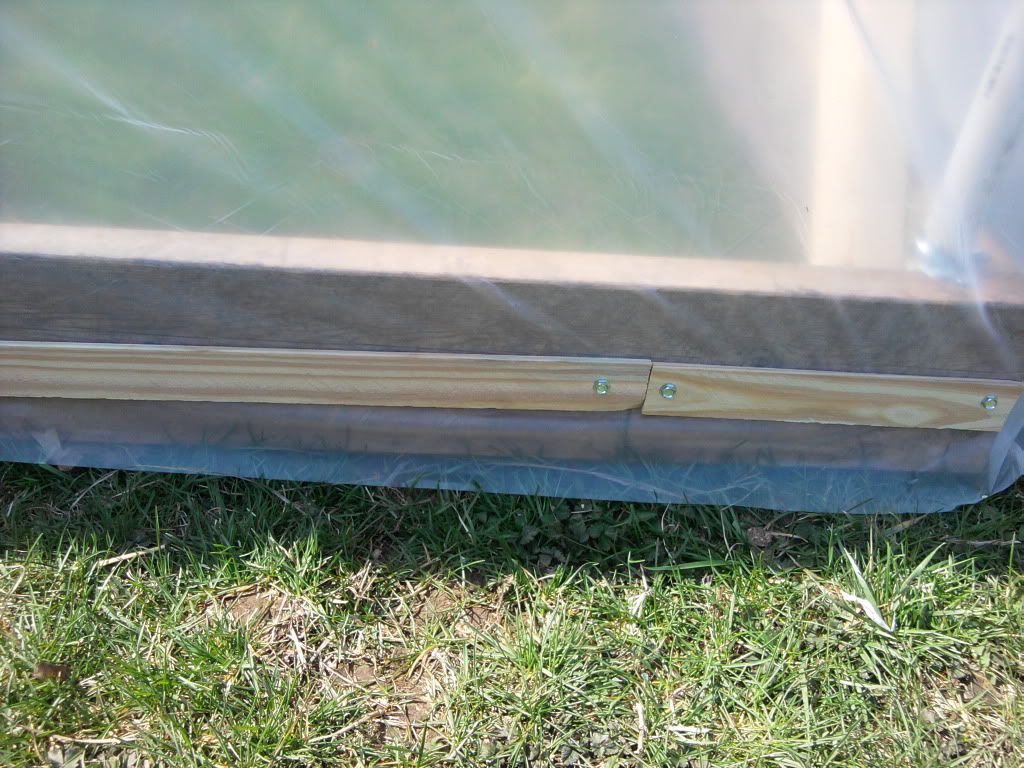
Not much to explain about putting plastic on the greenhouse. I used self tapping screws where I had to use small pieces of wood on the PVC pipe itself. I used nails and screws attaching plastic ot the endwalls and base. I just used the this strips of wood like in the pic.
Photobucket

Photobucket

Photobucket

Photobucket

Step 5

Remember when we used the plastic pipe hanger to "pull down" on the arches to relieve stress? So this is the last step and this I came up with on my own. Works great. If you are like me, then your plastic is not going to be perfect. It will have some loose spots, etc. Now that it is all up and the plastic is all attached, what you want to do is pull down on the arch that is tied down to the 2x6 along the top, and cut the pipe hanger. Do this slowly and when you do, the arches will want to bend more. Basically it willbow a bit and since the plastic is holding it on, it just tightens the plastic up around the greenhouse. Look at the before and after pics below and you will see in the first pic that the peek of the greenhouse is more pointed than round. That puts a lot of pressure on the main connectors at the peak.

Photobucket

Photobucket

Well, I hope this helps some of you out there. Post comments and let me know what you think, or poast questions you may have.

Monday, April 4, 2011

Garden Update 4/4/2011

So it's been a very busy year so far and a fourth of it is already gone. Garden season is upon us and it feels great. As most of you know, last year was a horrible year for The Pepper Guy. Had some tomato plants that made it the whole year, but no peppers. I was working so many ours at my job that I was not able to spend the time I wanted to on the garden. This year, though, I have started early indoors. I think there is like 1500+ pepper plants and 400+ tomato plants total so far. Once they get too big for indoors and it warms up just a bit, they can go into the greenhouse (which needs put back up). I did however get a new greenhouse frame from someone of craigslist. It is a 20'x60' and will most likely be used as a high tunnel for growing heirloom tomatoes. Try to at least extend the season a bit. Dont know if that is going to happen this year or not. I would like to get it put up this year and be able to use it next year. Baby steps...

Pepper Seedlings

Tomato Seedlings 1

Tomato Seedlings 2

Seed Strating Rack

Giant Pumpkin Seedlings

Friday, July 9, 2010

Freezing some extra corn on the cob.

We went to the Amish produce auction outsid eof Williamsburg, IN. We purchased 30 dozen ears of corn for our 4th of July celebration. We did not need 30 dozen, but we got a pretty good deal on it. Well, we had about 4 dozen left so we decided to freeze it off the cob. Here is a quick video of the process.

Friday, June 18, 2010

Getting ready for the 4th of July!

Just watned to show a quick pic of some banner flags I put up today. I also installed some flag style solar lights. If you click on the pic, you can zoom in on photobucket.They are located around the flowers. We have had so much rain in the past week that parts of the garden are flooded. I now have this thing in my garden. I was told it's called a mud monster.

Photobucket

Mud Monster

Sunday, June 13, 2010

Flowers and Bird Feeders

Just a quick post today of the bird feeder area I built for my wife. The bird feeder hangers are actually recycled hospital IV holders. They are great because they have a very heavy base that has been buried about 12 inches or so deep. The units height can be changed, as well as they are free to spin. Best of all is that they are stainless steel. They will never rust! I had no idea they would look as good as what they do. My wife has planted some petunias and a hummingbird mix. The hanging baskets are also petunias.

Bird Feeder

Monday, May 24, 2010

Pepper Lineup 2010

This years peppers will be grown in 5 gallon buckets. I have been wanting to try this for awhile now. Here is the lineup!

Anaheim
Banana
Bell Orange
Bell Red
Bell Yellow
Bhut Jolokia
Black pearl
Calico
Cayenne
Cubanelle
Habanero Orange
Habanero Paper Lantern
Habanero Red Caribbean
Hungarian Wax Yellow
Jalapeno
Jalapeno M
Joe E Parker
Marconi Golden
Medusa
New Mexico 64
New Mexico Chile
NuMex Big Jim
NuMex Twilight
Pepperoncini
Peter Pepper Yellow
Poblano
Pretty in Purple
Purple Beauty
Serrano
Super Chile
Tepin
Thai Dragon
Thai Hot
Tobasco

Garden 2010

We have had a bit of a late start this year with the garden. We recently moved, so things have been a bit bumpy. Anyways, we finally got the greenhouse put back up, the new garden plot tilled, and some seeds started. Our pepper seeds were started about amonth later than what I had wanted, so this year, we will be growing out peppers in 5 gallon buckets. We are doing this so that we can extend the season by putting the plants in the greenhouse. I worry that I started too late to get a harvest from the garden. This is just playing it safe.

I have posted some pics that I just took of the garden today.


Greenhouse
garden,greenhouse,growing,peppers

Petunias, marigolds, and tomato plants.
Flowers in front of greenhouse

Pepper seedings.
Pepper Seedlings

2 week old corn.
Sweet Corn 2 Weeks Old

2 week old peas.
Peas 2 Weeks Old

2 week old green beans. I have replanted the ones that did not make it for whatever reason(dogs!).
Green Beans 2 Weeks Old

2 week old potatoes.
Potatoes 2 Weeks Old

2 week old onions.
Onions 2 Weeks Old

Tomato plants.
Tomato Plants 4 Weeks Old